SerialTool VT-100 Serial Terminal

Last updated on by Oliver Reed

The SerialTool VT-100 terminal is designed for interactive communication with devices that use advanced text interfaces based on the VT-100 / ANSI standards. This mode is widely used in professional, industrial, and embedded environments, where the remote device exposes menus, shells, or text-based configuration interfaces via the serial port.

Note: for detailed information you can also visit this link SerialTool Terminals

Unlike a “classic” serial terminal, which is limited to displaying received bytes, SerialTool's VT-100 terminal interprets the data stream and ANSI escape sequences, allowing for a correct graphical rendering faithful to the interface intended by the device.

Interactive Communication and ANSI Sequences

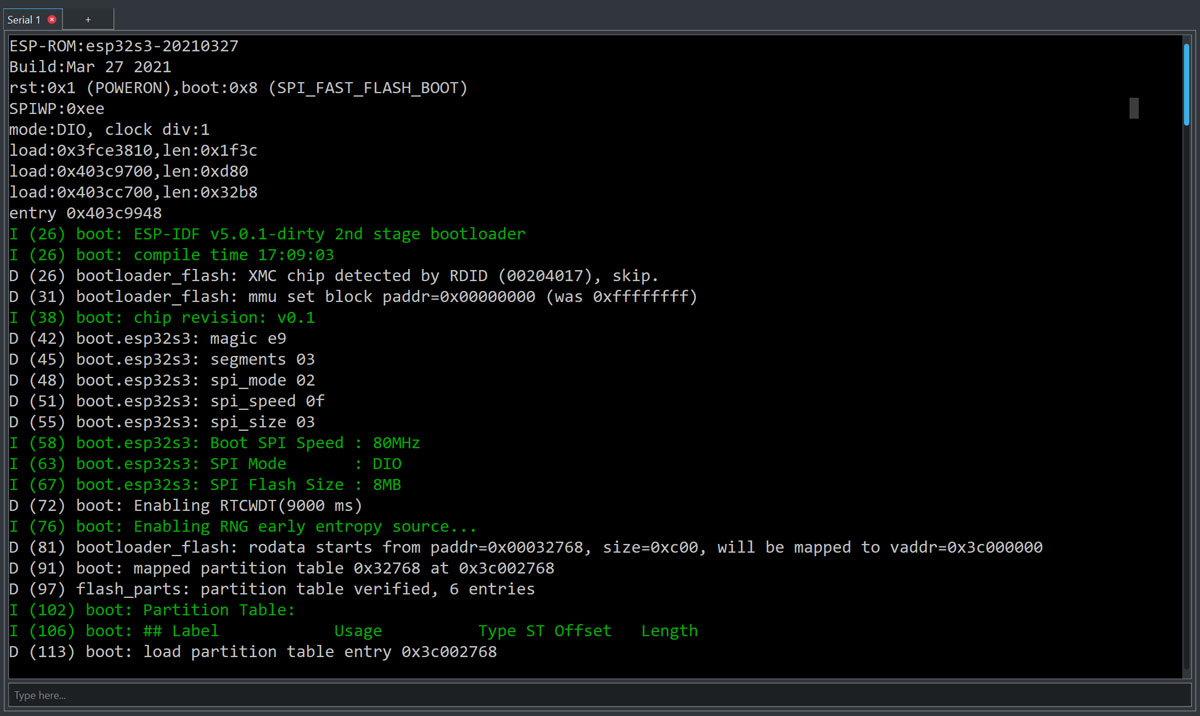
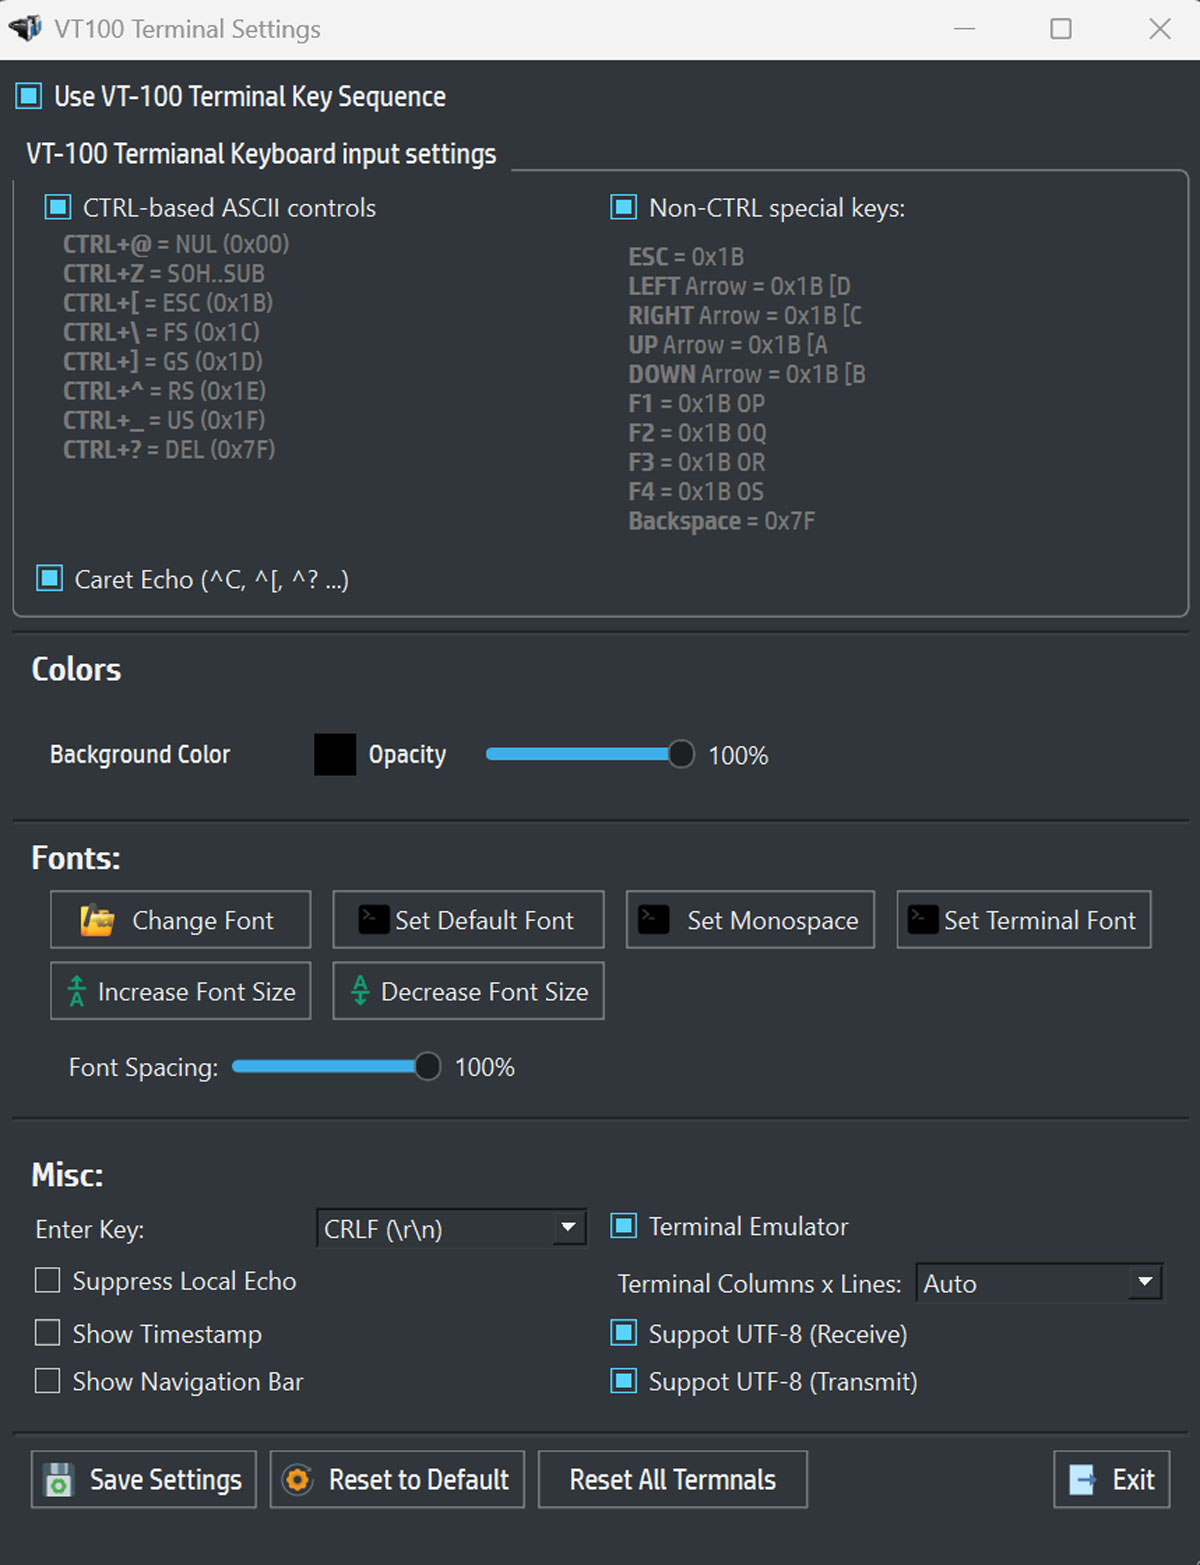
In the VT-100 terminal, transmitted data are not simple ASCII characters but include control sequences (ESC) used to perform “visual” operations within the terminal. SerialTool interprets these sequences in real-time, allowing the display of colored output, interactive prompts, text menus, and dynamically updated screens.

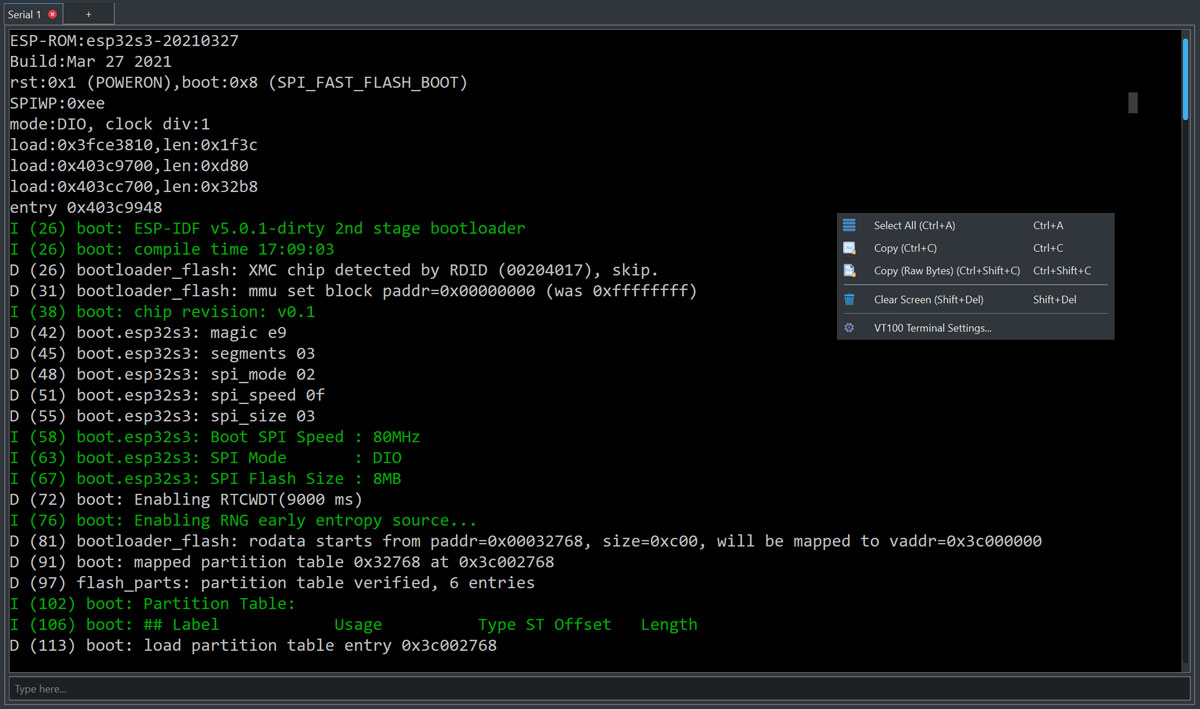
ANSI/ESC sequences are typically used to:

  • move the cursor on the screen;
  • clear lines or the entire terminal content;
  • change text color and attributes;
  • manage interactive menus and dynamically updated screens;
  • show progress bars or textual indicators.

When to Use the VT-100 Terminal

VT-100 mode is recommended when connecting to devices requiring advanced human-machine interaction, for example, for configuring or managing equipment and embedded systems via serial console.

Typical examples:

  • network routers and switches;
  • hardware firewalls and enterprise access points;
  • enterprise servers (BIOS/UEFI, remote management modules);
  • embedded Linux systems (console, U-Boot, shell);
  • PLCs and industrial devices with text menus;
  • microcontrollers during boot or in console mode.

A VT-100 Terminal Integrated into a Complete Tool

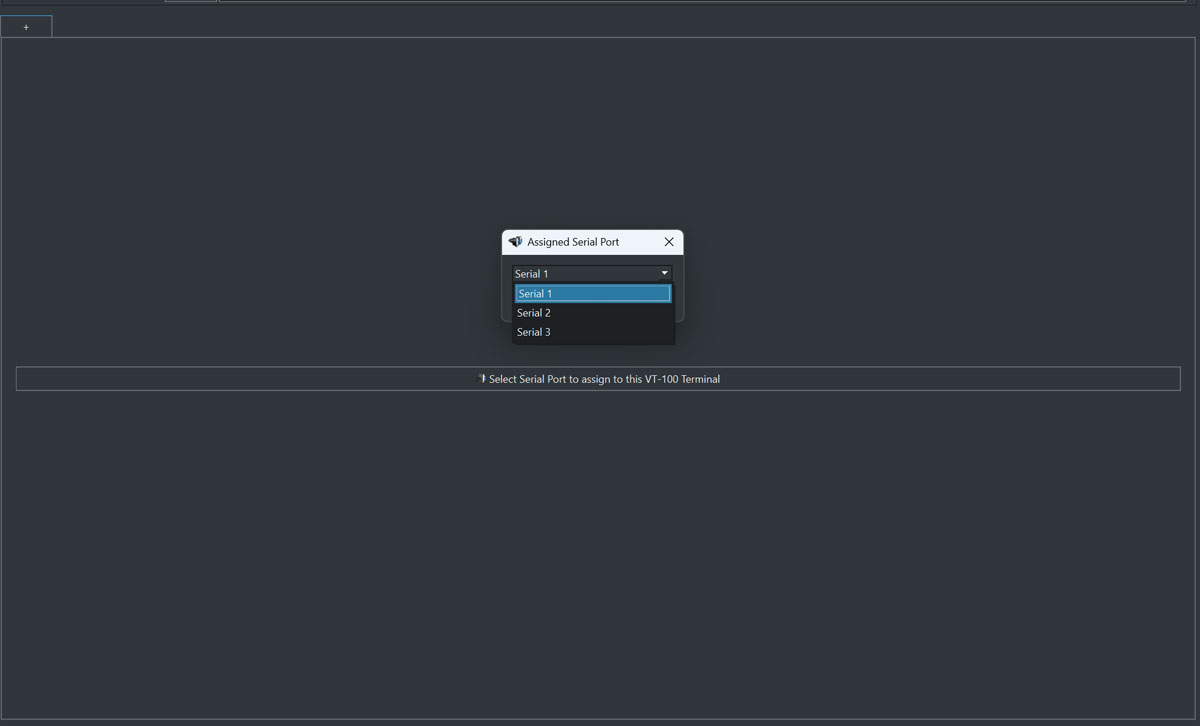
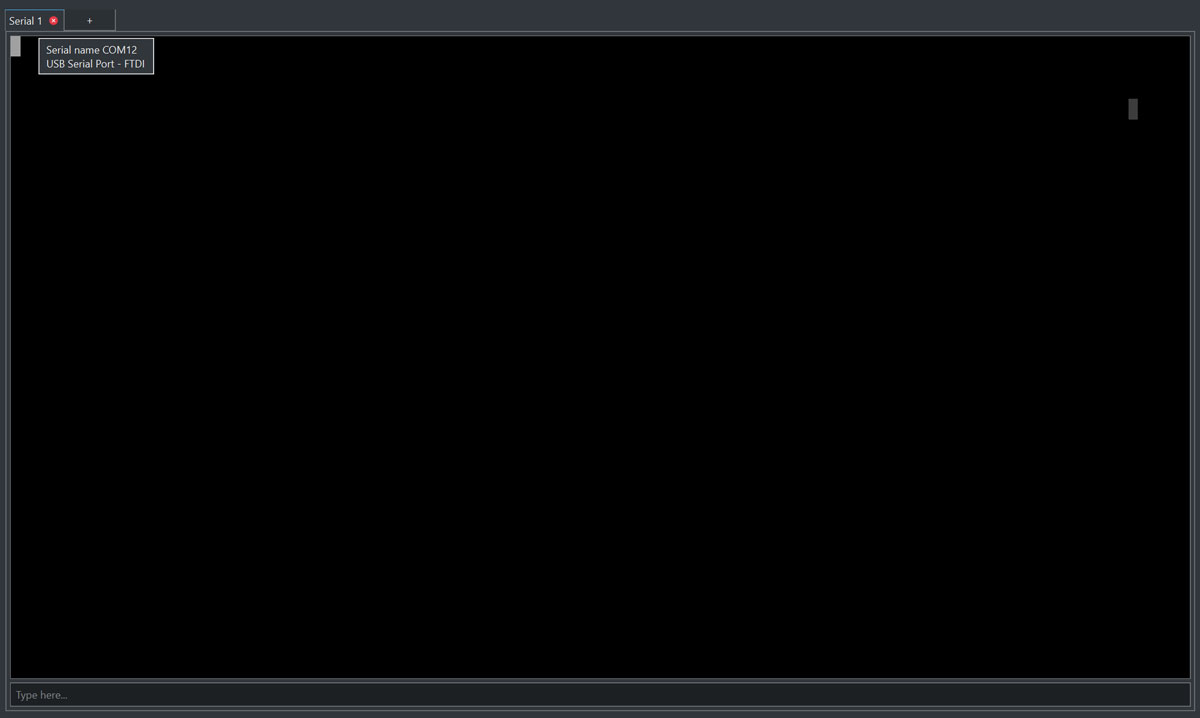
The SerialTool VT-100 terminal is fully integrated into the software and can be used alongside other advanced features. You can assign a dedicated VT-100 window to each serial port, keeping the logs of multiple devices separate and making traffic analysis easier.

In this way, SerialTool combines VT-100 emulation and low-level serial debugging in a single solution, avoiding the use of separate applications.

Thanks to full support for the VT-100 standard and ANSI sequences, SerialTool offers a reliable and professional serial interaction environment, ideal for embedded developers, industrial technicians, and IT professionals.

What to Know About the SerialTool VT-100 Serial Terminal

The serial terminal has some important peculiarities to clarify regarding the general operation of SerialTool. First, SerialTool has two major categories of terminals: the serial terminal and the hexadecimal terminal.

The serial terminal, in turn, can work in two distinct modes: classic mode and VT-100 emulation mode, the subject of this document.

The classic terminal displays all incoming and outgoing traffic from all open and assigned serial ports in a single main screen.

It is useful to make a detailed premise on the operation of the classic serial terminal to better understand the differences compared to the serial terminal in VT-100 emulation.

For each serial port, in the classic terminal, incoming and outgoing traffic is represented with different font colors to facilitate reading.

Transmitted and received bytes can be viewed in various modes: ASCII, hexadecimal, binary, or a combination of these. This is because the developer may have different analysis needs, especially when working with proprietary or standard protocols such as Modbus.

A fundamental aspect is establishing when to insert a new line in the terminal to prevent all bytes from being displayed continuously, making interpretation difficult.

In the classic terminal, it is therefore necessary to determine if the data arrives in streaming mode, and if upon the arrival of a terminator character (for example 0x0A, 0x0D, or a combination thereof) a new line should be added.

In other cases, it is necessary to determine the end of a packet even in the absence of a terminator character. This happens by measuring the time elapsed since the last received byte.

For this reason, each serial port has the parameter Last Byte Timeout, expressed in milliseconds, after which SerialTool displays the received packet.

This concept is fundamental and must always be kept in mind.

Classic Terminal – Packet Mode

In Packet Mode, a new line is added to the terminal:

  • always when SerialTool sends a sequence of bytes, at the end of the transmission;
  • in reception, when the time set in the Last Byte Timeout expires;
  • when bytes are sent or received from different serial ports.

Classic Terminal – Streaming Mode

In Streaming mode, a new line is added:

  • upon receiving a terminator character (even custom);
  • when bytes are sent or received from different serial ports.

Differences with the VT-100 Terminal

The serial terminal with VT-100 emulation introduces significant differences. Firstly, it is possible to have one or more screens dedicated to each open serial port.

Each serial port is therefore associated with a specific window (tab), keeping the traffic of multiple devices separate. This is the first difference at the graphical interface level.

The second difference is functional: while in the classic terminal bytes are displayed according to user preferences (ASCII, HEX, etc.), in the VT-100 terminal, the byte stream is interpreted by the emulator, assuming a visual meaning.

For example, the remote device may send colored messages, and the text color is not chosen by the user, but determined by the device and interpreted by the VT-100 terminal.

The VT-100 terminal also interprets sequences for clearing the screen, repositioning the cursor, and other graphical operations.

A further feature is the management of rows and columns, which allows the terminal to emulate a real text application, knowing the “resolution” of the screen in terms of characters.

The user can also send special character sequences to the remote device, including key combinations like CTRL + key, which generate specific behaviors.

This type of interaction would be extremely complex using a low-level classic terminal.

These preliminary explanations are fundamental to understanding which type of terminal to use based on your needs. The good news is that SerialTool supports both modes.

How to Use the SerialTool VT-100 Serial Terminal

As mentioned previously, each terminal window must be assigned a physical serial port, which represents the basic operating principle of SerialTool.

First, select the terminal mode from the main menu.

serial terminal option select

Select Terminal Mode

set serial port terminal mode

Select VT-100 Serial Terminal Mode

Let's start by showing the screen from which you can assign a serial port to the VT-100 serial terminal.

If there are serial ports already configured from the serial port configuration menu, these can be assigned to a specific tab of the SerialTool VT-100 terminal.

Clicking the central button displays the available serial ports that can be assigned for display in the VT-100 terminal.

serial port terminal assignment

Main serial terminal screen with assigned serial ports

Once the serial port is selected, a dedicated tab is opened containing the information of the terminal and the assigned serial port, including references to the physical port or adapter used (for example COMx on Windows or the device path on Linux and macOS).

serial port terminal port

Screen with serial port 1 assigned and opening of a dedicated Tab

At this point, once the terminal associated with the serial port is open, it is possible to receive and send bytes to the remote device (remember to open the serial port from the dedicated configuration menu and correctly set the communication parameters).

In the following example, the boot of an ESP32-S3 module is visible. The text displayed in green is generated by the ESP32 module, which sent a specific sequence of bytes subsequently interpreted by the SerialTool VT-100 emulator.

serial port bootloader esp32

ESP32 Module Bootloader Screen

In the VT-100 terminal, you can select an area of characters of interest with the mouse and subsequently export it using the right mouse button.

serial port export data

Terminal data export (copy) screen

Pressing the right mouse button, besides the ability to copy the content of the terminal, allows you to modify some terminal configurations, within the limits provided by VT-100 emulation.

Selecting “VT100 Terminal Settings”, you can modify the terminal settings and save them as the default configuration for that serial port.

It is important to emphasize that configurations remain unchanged even if the physical serial port changes. This allows, in case of a SerialTool restart, to maintain the settings associated with the logical serial port and not the physical device.

For example, if serial 1 is initially assigned to port COM12 and is subsequently assigned to COM8, the settings will remain unchanged because they follow the assigned serial and not the physical port.

VT100 Terminal Settings – Full Explanation

Starting from the settings screen (right click and “VT100 Terminal Settings”)

serial port terminal settings

Settings screen of the serial port terminal in VT-100 emulation

Use VT-100 Terminal Key Sequence

Activates the actual VT-100 emulation. Key sequences (arrows, F1–F4, ESC, etc.) are sent exactly as a real VT-100 terminal would.

Fundamental for:

  • text menus
  • embedded shells
  • bootloaders

Recommended: ON for serial use

VT-100 Terminal Keyboard Input Settings

CTRL-based ASCII controls

Maps CTRL + key combinations to classic ASCII codes:

CombinationCodeMeaning
CTRL + @0x00NUL
CTRL + Z0x1ASUB
CTRL + [0x1BESC
CTRL + \0x1CFS
CTRL + ]0x1DGS
CTRL + ^0x1ERS
CTRL + _0x1FUS
CTRL + ?0x7FDEL

Essential for firmware, serial monitors, and low-level debugging. Recommended: ON

Non-CTRL special keys

Defines what is sent when special keys are pressed:

KeySequence
ESC0x1B
ESC [ D
ESC [ C
ESC [ A
ESC [ B
F1–F4ESC OP / OQ / OR / OS
Backspace0x7F

Compatible with U-Boot, Linux serial console, and VT-100 menus. Recommended: ON

Caret Echo (^C, ^[, ^?)

Displays control characters in readable form (e.g., CTRL+C → ^C). Useful for debugging and teaching.

Recommended: OFF for normal use, ON only for debugging

Colors

  • Background Color – Terminal background color
  • Opacity – Window transparency

Fonts

  • Change Font / Set Default / Set Monospace / Set Terminal Font
  • Increase / Decrease Font Size – Text zoom
  • Font Spacing – Spacing between characters (recommended 100%)

Misc

Enter Key – Defines what is sent when pressing Enter:

  • CR → \r
  • LF → \n
  • CRLF → \r\n

Typically: MCU / modem / firmware → CRLF
Embedded Linux → often LF
Recommended: CRLF

Suppress Local Echo: if active, it does not show what you type (use only if the remote device echoes).

Show Timestamp: shows the timestamp next to received data.

Show Navigation Bar: enables navigation in the log history (useful only with Terminal Emulator active).

Terminal Emulator: allows keeping the history of received and sent bytes, overcoming the visual limit of rows and columns of the classic terminal.

Terminal Columns × Lines: terminal dimensions. Auto mode recommended.

Support UTF-8 (Receive / Transmit): decodes UTF-8 in reception and sends UTF-8 in transmission. Recommended: OFF unless specifically needed.

Save Settings – saves the configuration of this serial port
Reset to Default – resets only this terminal
Reset All Terminals – global reset
Exit – closes the window